Sandcasting

Overview
Sand casting is ancient yet still widely method for creating molds for metal casting. The sand mold is formed by pressing oil dampened sand around a model that is then removed to leave a cavity. Sand molds are fragile and are completely destroyed after the casting. Sand molds can be prepared and then immediately used without pre-heating. During tamping the sand grains align against the surface of the model and when the metal is cast the sand is capable of conveying a surprising amount of detail. Another limitation of sand casting is the mold are constructed in two halves that have to be pulled away from the model without dislodging the delicate sand, thus the model must be carefully positioned so that there are no overhangs.
Materials
* 2 matching sand mold frames with registry pins.
* 5 lbs of casting sand
* talc parting powder
* model
* sprue forms
* tamping tools
* crucible or ladle
* pewter grains
* plywood board
Instructions
1) Make a model that will fit with at least 1" of space inside the casting frame. Choose the edge that will form the parting seam and be sure that there are no overhangs that will prevent the sand from being lifted straight off of each side. For convenience you could make a model in two halves with a flat surface down the middle and registry pins. This will save a lot of trouble with leveling and support a double convex shape.

2) Place the flat side of the model on the plywood sheet. Place the pin-less side of the casting mold around the model so that there is a 1" space on all sides. Insert a sprue form between the model and the top of the sand. Dust the model with parting powder and create a channel or sprue through which the pewter will be cast.
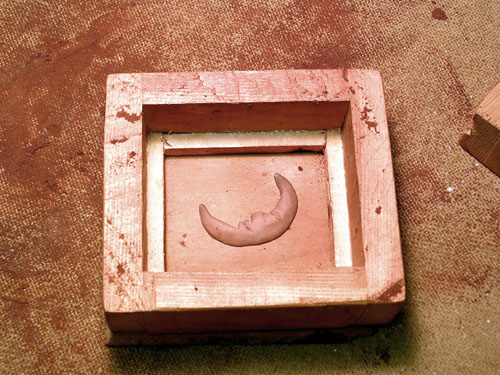
Place model on flat board.
3) Sprinkle a 1/2 inch layer of casting sand over the model and gently press it against the surface of the model. Add additional layers and the sand with a tamping tool. Be careful not to press through the sand and touch the model.
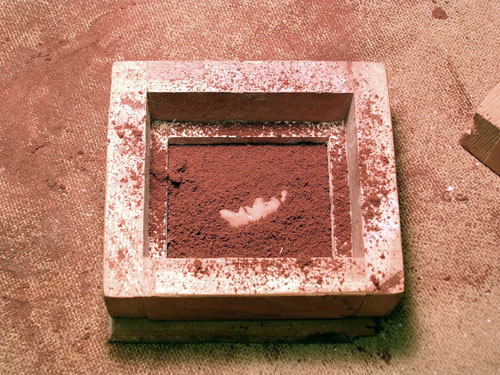
Sift sand on model.

Press sand on to model.
4) Scrap the top of the sand perfectly even with the frame. Hold the frame against the plywood sheet and invert it onto a flat surface exposing the flat side of the model. Carefully pry loose the model and sprue to confirm that it is removable without wrecking the sand mold.

Scrape off excess sand.
5) Dust the model cavity and sand surface with more parting powder. Replace the model and sprue and dust it again.
Invert, remove board and scrape excess sand forming a seam.
6) Insert the top half of the sand frame while aligning the pins into the matching holes in the bottom half.

Add other mold frame and sprue.
7) Repeat the filling and tamping process until you have filled the top half of the mold.
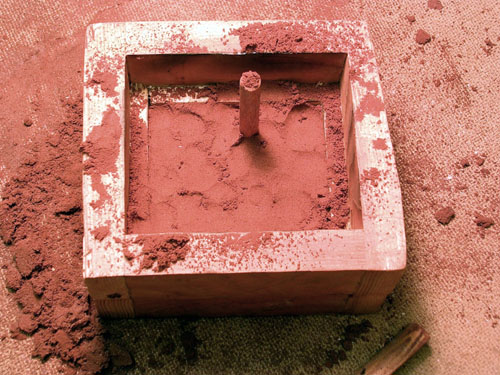
Fill second half with sand.
Compress and scrape excess sand
8) Gently turn the frame on its side and use a knife to pry apart the mold halves in small increments working from one side to another.
When the mold is open remove the model and sprue. Clean up the edge surrounding the sprue and attempt to tamp down any loose edges. If an edge has broken loose this will result in extra metal being cast along the seam. This can be filed away later. Loose sand along the seam that breaks off during the pour will create a flaw in the piece that will be difficult to repair.
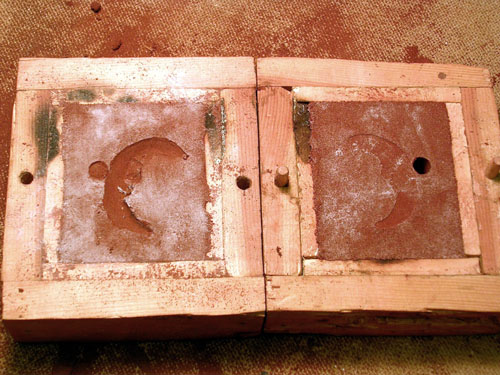
Carefully remove the model.
9) Estimate a more than sufficient volume of pewter grains and place them in the heating ladle. Prepare a wooden ingot mold to pour waste pewter after you have filled the form.
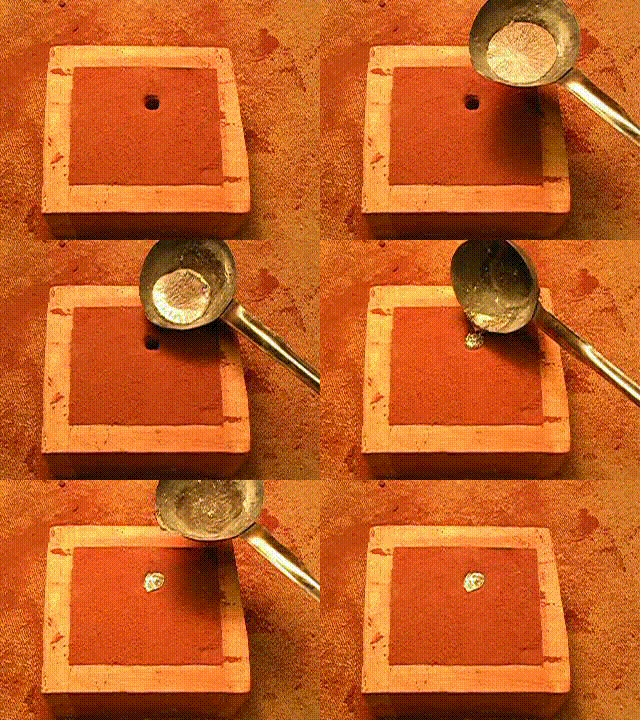
10) Heat the pewter grains until liquid. The pewter should not be red hot but just hot enough to burn a wooden matchstick dipped into the liquid metal. Pour the pewter until the sprue is full. As the pewter rapidly cools it will contract into the mold and the sprue will form a funnel. If the piece is large you could continue to top up the level of metal in the sprue
11) After a few minutes of cooling separate the molds and use a wire brush to clean sand off the pewter piece. Saw off the sprue and recycle this waste metal. File and sand any imperfections along the seams.

Open the mold frame.
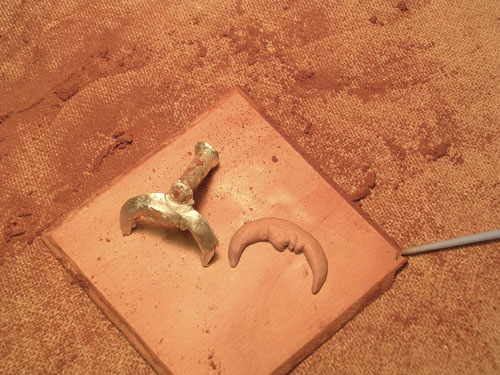
Clean off casting still attached to sprue
12) Pewter will slowly oxidize to a dull gray. You can speed this process by painting the piece with vinegar. If you want to preserve the shiny metallic luster immediately spray the piece with a clear varnish sealant.
Sources
